Common House Rendering Problems (Cracks, Blowing, Algae) & How to Avoid Them — Practical Prevention and Repair Guidance
You want your home’s render to protect and look good, not crack, blow or grow green stains. Small hairline cracks can let moisture in, blown patches expose base layers, and algae or moss trap damp — each problem costs time and money if you ignore it. Tackle the real causes — poor application, trapped moisture and lack of maintenance — and you cut the chance of repeat repairs and preserve your walls for years.
This post shows how to spot the difference between cosmetic and structural issues, which fixes you can do yourself and when to call a pro, and practical steps to prevent problems from coming back. By the end you will know how to protect your render against cracking, blowing and organic growth and make smarter choices about repair or re-rendering.
Common House Rendering Problems
You’ll see three recurring issues that reduce render performance and appearance: structural cracking, sections detaching from the substrate, and biological growth staining and trapping moisture. Each problem has clear causes and visible signs you can check for quickly.
Cracks in External Render
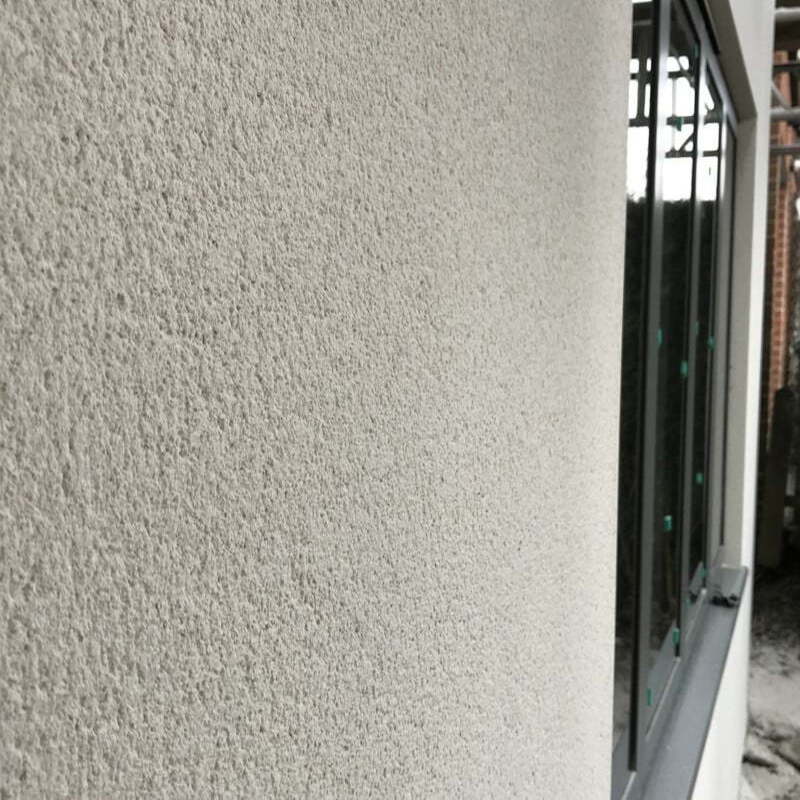
Hairline cracks often start from shrinkage in the topcoat or poor joint detailing around openings. Look for thin, spider-web lines that follow the render texture or appear at corners and window reveals; these are usually cosmetic but can widen if left untreated.
Deeper cracks that reach the substrate or run continuously over several metres indicate movement, poor substrate preparation, or thermal cycling. These let water reach the basecoat and masonry, so repair promptly to prevent frost damage and rising damp.
Repair steps depend on depth: rake and clean hairline and shallow cracks, then use a compatible flexible filler or silicone-acrylic repair mortar. For structural cracks, consult a professional to check for substrate movement and use appropriate reinforcement, such as crack-bridging render systems or movement joints.
Render Blowing and Delamination
Blown render detaches from the wall in patches, often with a hollow sound when tapped. Common causes include inadequate keying to the substrate, applying render to damp or contaminated surfaces, or using the wrong bonding agent. Blows also occur when moisture becomes trapped behind the render and freezes, expanding the layer.
Inspect for areas where render flakes off, large circular patches, or pockets of powdery sand beneath the surface. Small isolated blows can be cut out and patched with a matching mix; larger delaminated areas usually require removing back to sound substrate, improving preparation, and re-rendering with correct adhesives and curing.
Prevent future blows by ensuring surfaces are clean, dry, and properly keyed; use manufacturer-recommended primers and follow correct curing times and weather conditions.
Algae and Mould Growth
Green, black, or brown staining on render comes from algae, mould, or lichen feeding on dirt and retained moisture. North-facing elevations, shaded walls, and areas near vegetation suffer most because they stay damp longer. Growth not only looks unsightly but can hold moisture against the render and accelerate decay.
Clean affected areas with a suitable biocide or diluted bleach solution, rinse thoroughly, and allow the surface to dry before any repair or repainting. If growth recurs, improve drainage and daylight access: trim back plants, repair guttering and downpipes, and consider applying a breathable, anti-microbial render finish.
Choose breathable materials and paints to let trapped moisture escape; impermeable coatings can worsen recurrent biological growth by locking moisture in.
Effective Solutions and Prevention Strategies
Prepare surfaces correctly, choose materials matched to your wall substrate and exposure, and control moisture with good detailing and drainage. These three actions prevent most cracking, blowing and biological growth.
Best Practices for Surface Preparation
Remove loose render, dust and salt deposits before you start; use a scraping tool and a wire brush, then rinse with clean water. For old lime or cement render, test adhesion with a tape or pull-off test and remove any delaminated areas back to sound material.
Repair structural defects first — fix movement cracks, replace rotten timber and repoint open joints. Apply a suitable bonding agent to smooth or weak substrates and use mechanical keying (e.g. scratched or dotted base coats) on smooth concrete to improve adhesion.
Prime porous backgrounds with a dilution of the chosen render primer so the substrate doesn’t draw moisture from fresh render too quickly. Keep ambient and substrate temperatures within manufacturer limits during application to avoid premature drying or frost damage.
Choosing Suitable Rendering Materials
Match the render type to your substrate and exposure: use lime-based mixes for breathable, older masonry and cement or polymer-modified renders for modern blockwork and higher-impact areas. Read technical datasheets for compressive strength, flexibility and vapour permeability values.
Select finishes with algae-resistant additives or smooth acrylic topcoats in shaded, damp locations to reduce green growth. Choose a two-coat system (base coat plus finishing coat) where possible; it provides better crack control than a single thick coat.
Use corrosion-resistant reinforcement (fibreglass mesh) across joints and over repairs to distribute stresses. Confirm compatibility between primer, base coat, mesh and final coat to avoid bonding failures or staining.
Moisture Management Techniques
Ensure rooflines, gutters and downpipes discharge water away from rendered walls; repair leaks and maintain clear gutters to prevent staining and saturation. Provide at least 150 mm clearance from ground level to the render or install a ventilated plinth to avoid rising damp.
Fit breathable membranes or cavity trays where required and check wall ties for corrosion that can allow moisture ingress. Create a continuous damp-proof course and renew or inject DPCs where rising damp is diagnosed by testing.
Promote drying by keeping nearby vegetation trimmed and maintaining air gaps at eaves and around windows. For consistently damp elevations, consider using hydrophobic additives in the outer render coat and improving external drainage paths.
Frequently Asked Questions
These answers focus on the specific causes, prevention and repair steps you can apply to common rendering problems: cracking, render blowing, algae growth, material choice and routine maintenance.
What are the primary causes of cracking in house rendering?
Cracks most often start from structural movement, poor substrate preparation, or thermal expansion and contraction.
Minor hairline cracks can come from rapid drying during application or inadequate curing time.
Moisture trapped behind render, either from penetrating rain or rising damp, widens existing cracks over time.
Poorly mixed or low-quality render and incorrect reinforcement at joints also increase cracking risk.
How can one prevent render from blowing off the walls?
Ensure the substrate is sound, clean and properly keyed before you apply render.
Use mechanical fixings or a suitable primer where required and follow the manufacturer’s guidance for bonding agents.
Apply render in correct coat thicknesses and allow proper curing between coats to avoid internal stress.
Provide adequate drip edges, flashing and surface detailing to keep water away from the render/structure interface.
What steps can be taken to minimise algae growth on external walls?
Keep external walls dry by ensuring gutters, downpipes and flashings are intact and diverting water away from surfaces.
Trim back vegetation so walls get sunlight and airflow; shade and dampness encourage algae.
Use a biocide wash on affected areas and select breathable, mould-resistant paints or silicone-based renders where algae is a recurrent problem.
Clean gently with a soft brush or low-pressure hose to avoid damaging the render surface.
Which materials are best suited to reduce render failure?
Cement-lime blends or polymer-modified renders give improved adhesion and flexibility compared with pure cement render.
Breathable lime-based renders suit older masonry by allowing moisture to evaporate rather than trap it.
Use corrosion-resistant metal mesh and stainless or galvanised fixings in reinforced systems.
Choose renders and primers certified for exterior use and compatible with your underlying wall construction.
What maintenance routines can prolong the lifespan of house rendering?
Inspect render annually for hairline cracks, peeling and staining so you catch problems early.
Clean gently to remove dirt and organic growth; avoid high-pressure washers.
Repair small defects promptly with compatible materials and repaint or recoat when the protective finish shows wear.
Keep rooflines, gutters and ground levels maintained to prevent water from reaching the render.
Is it possible to repair render cracks, and how should it be done?
Yes — small hairline cracks can often be filled with a flexible exterior filler and overcoated with a compatible finishing coat.
Widen and rake out larger cracks, remove loose material, apply bonding primer and use an appropriate repair render in layers, matching texture and thickness.
For extensive blowing, disbonded patches or cracks tracking structural movement, remove the affected area and either re-render the whole elevation or call a professional to assess structural causes.